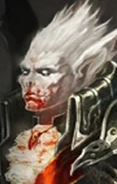
Hexxat's request is a companion quest involving both Clara and Hexxat.
Shadows of Amn[]
Recruiting Clara[]
The quest is initiated by recruiting Clara in Copper Coronet before chapter 4.
Bring Clara to Graveyard District. Clara’s presence is needed at some vital points in order to progress, thus it’s advised to keep her in party before her inevitable departure.
Recruiting Hexxat[]
Head over to the large tomb just east of the starting zone (x=2400, y=1850), where you’ll encounter two shade thieves, you may avoid them showing up by picking the 2nd option in dialog with Clara.
Enter the tomb, Clara will reveal a secret door, before you drag your party down into the depths, loot the sarcophagus (x=450, y=400) for Staff of Curing.
Killing two shade thieves at the Dragomir's Tomb entrance, head southwest to dispatch a Shade Wolf and disarm a trap, continue the way you'll encounter more Shade Wolves plus Devil Shades who can drain levels, and when they are close to death, spawn two Shadow Fiends.
Continue west ignoring east, disarming two traps as you go, find Dragomir's sarcophagus (x=1000, y=800). Hexxat will implore you to climb in. Before you do so however, loot another sarcophagus to the north-east, disarm a trap to the south-west beyond Dragomir's sarcophagus then explore down the tunnel, kill three Shadow Fiends, and loot another sarcophagus for Protection From Undead scroll. Send someone with thieving skills into the sarcophagus (there’s no limit how many people you may send, but you need to do it one at a time), disarm the trap down the way then talk to Burich. Kill him or convince him to hand over Iron Rod.
Back to the entrance, use the rod on the cylinder slot, a hidden wall south will open, locking the way out at the same time (you may interact the cylinder any time to reopen the seal, just be careful not to position anyone in the shadow zone behind the entrance else the wooden door will lock them within).
Go through the newly opened wall, beware of the trap (x=2000, y=1020), continue the way and you'll eventually bump into Dragomir, whose death is required for Clara to dispel the purple light barrier for you (Dragomir is not able to detect invisibility, and is also bugged - you can lead him towards the southern purple light to trigger his trace back to his original position, he won’t attack you at all after that). Cloak of Dragomir will be dropped on ground once you killed its owner, either pick it up for an extra scene later, or leave it to be silently grabbed by Hexaat.
Head south, then turn down a hallway west, send Clara the barrier will vanish.
| “ | A wave of foul necrotic energy hits you-you withdraw immediately and involuntarily. Only someone of single-minded purpose could overcome this barrier. | ” |
Clara will permanently leave the party upon meeting Hexxat, who will then wait where you fought Dragomir (despite saying to meet her in the Copper Coronet). You may recruit her now if you don't have Keldorn in party, or purpose your offer again where she searches for Cloak of Dragomir, or just meet her later at Copper Coronet (keep your own pace as the “two hours” appointment limit she stresses doesn’t actually exist). Seconds later upon joining, Hexxat will let you hold on Dragomir's Respite, which is literally a Bag of Holding with 99 free slots, very handy as you do not have to make sail to Spellhold or try and find one in Watcher's Keep if your game installation allows early visits there.
The Claw of the Black Leopard[]
Keeping Hexxat in the party means submitting to various quests as delivered by her Master L, but you'll have to wait for about one week before the messages are delivered by Cabrina, rests & travel both count towards the total time required, and Cabrina only appears at night, in the Athkatla streets other than the Graveyard District.
After the encounter, go to the Graveyard District where Hexxat will initiate a dialogue asking if you are ready to tombwalk via Dragomir's Casque. Be warned that once you get teleported to Crypt of Durkon (OH7100) you'll have to either get hands on Claw of the Black Leopard or dismiss Hexxat (which will cause both her and her quest to disappear until ToB) in order to return to Amn, so decline her offer, make sure you're ready to proceed, then manual talk to her while in Graveyard.
Head south when arriving at Crypt of Durkon, loot sarcophagi and disarm a rather huge trap until you find a group of 'Ghostly Monks' led by one Keno (x=500, y=1020), agree to help them rid of underdark intruders so that you don't miss out an optional zone, an extra scene with Hexxat plus some xp. Go through the newly opened door next to Keno and fight Umber Hulks then Mind Flayers led by Goxxa the Alhoon with the monks. If Keno survived, he'll give you Key of Scholars we need to progress; If Keno died, but any other ghosts survived, the key will drop but you'll have to put the ghosts down here too.
Loot the sarcophagi (x=1050, y=1300) for Periapt of Life Protection and disarm traps as you go, with the key, open the door at (x=1900, y=1600). Open any sarcophagi nearby to awake five angry Greater Mummies to deal with, the middle sarcophagi (x=2100, y=1420) has The Jade Fang dagger. If Keno died, more ghosts will attack you from all sides along the way.
Take the east way to find Ki Chin Sang (x=1900, y=820) who holds Key of the Master's Crypt. You can fight him for it. He will also hand it over voluntarily if you challenge the master's six 'most trusted lieutenants' in the hallway to the south. Accept the challenge for more xp: after you kill Borok-Tosst, Yi Niu, Weimin Min, Ming-hua Dai, Yi Kwon, and Jiang Dai who merge after clicking one of their sarcophagi, Ki Chin Sang will walk to you and hand over the key.
Alternatively, the key can be pickpocketed (confirmed with Jan @ 125 skill). Your first try will get a few coins.
Use the key to open the doors at (x=1350, y=550), disarm two traps to meet Nan Kung Chi at (x=2169, y=556), whatever you say will end up into a fight, loot his tomb at (x=2047, y=486). Once you possess the Claw of the Black Leopard, Hexxat will offer to be back to Amn, if you decide to stay a little longer (probably kill some ghosts for xp), just to tell her to wait then manual talk to her again. (Hexxat will have several lines for expressing her impatience to get back, but even after you’ve got the Claw in your inventory that she’s looking for, booting her won’t make her take it, nor make her parting lines any different than usual...)
Shroud of the Unproved[]
As before, the second message from L comes about one week later. Head to Graveyard after meeting Cabrina to get teleported, be sure to get prepared, as usual.
When you arrive at the Tomb of the Unproved (OH7200), you'll notice there are four Hakima with a ghostly appearance standing to the north-east. Learn their story if you like; their names are required later for a riddle (Sukayna, Rabi'ah, Bilquis, and Aminah). You can pass by them peacefully after the conversation or prepare a difficult battle with them. Each is worth 10000xp and they drop a Shortbow +3 and more than 10 greater healing potions (40 hp). They are two skilled Diviners and two Fighters. You can clear out the spiders and traps in the corridor south of the entrance before the battle if you need a place to retreat from their high-level spells (including Time Stop, Gate and Abi-Dalzim's Horrid Wilting). The Scimitar +1, Piece of Silk, Gold Statue, and Lamp of Oil from the chest behind them each unlock more potential challenges later on.
Go through the door south, disarm traps (x=450, y=1000) (x=450, y=1000) (x=450, y=1450) (x=450, y=1500) dealing with Bloated Spiders. These are each of them pregnant with smaller spiders, which will burst out and attack when the Bloated Spiders die, unless the mother spiders are killed out of sight (e.g. with a well-aimed Cloudkill or Fire Storm).
Prior to passing through the next door, you can elect to put the Piece of Silk in the nearby statue container. It will disable three traps tied to the three other items found in the chest near the tomb's entrance. Taking back the Piece of Silk will not reactivate these traps, so read on to see what they do before making that decision.
Behind the door is a hall of statues. If you didn't use the Piece of Silk, several things can happen:
- If you brought the special Scimitar +1 from the prophet's chest, the blue-circled warrior statues will animate and attack, but with very low leftover HP. All four have Scimitar +1 and Full Plate Mail.
- The floor ahead is trapped with spikes that cannot be disarmed. Haste and Stoneskin or Mirror Image will help pass through. The character holding the Gold Statue will suddenly be locked in place, unable to move as spikes continue to spring from the ground. Investigating will reveal that the statue now weights 1000 pounds. A strength of 23 or better may be able to carry the weight unaffected. Failing that, place the statue inside Dragomir's Respite or another bag of holding, or drop it to the ground.
- Past the spikes, you'll fight two more warrior statues if you brought the Scimitar +1 around. If you have the Lamp of Oil in possession, a Fireball trap will trigger and a Furious Genie will appear. He will drop Rashad's Talon.
Separate from the matter of the 4 special items, you can turn to flesh one of the eight green-circled mage statues; there is a Stone to Flesh arcane scroll in the next room just in case. Upon killing them all, the dummy chest in this hall will “disappear” so that you can loot it for Boots of Elvenkind.
Bugs[]
- This chest thing is likely a bug, as it might have been intended to be initially invisible and only appear upon killing the mage statues.
- The enabling of the chest container is accompanied with sound effects that may run in an endless loop. If that happens to you, you can disable that sound with no side effects with the following console command, depending on your version of the game:
 Baldur's Gate II: Enhanced Edition – Shadows of Amn (2013)
This icon indicates content from the Shadows of Amn campaign of the Baldur's Gate II: Enhanced Edition. C:SetGlobal("OHH_wiztrap","OH7200",2) Baldur's Gate II (2001)
This icon indicates content in the original Baldur's Gate II: Shadows of Amn campaign that's only available if Throne of Bhaal is installed. CLUAConsole:SetGlobal("OHH_wiztrap","OH7200",2)
In the library, Hexxat will initiate the dialog with Diya al-Hafiz which will eventually wind up in a fight, which means you can prepare traps & summons before bringing Hexxat in there. Diya al-Hafiz, Iqbal al-Din, and Qais Ra'id will also not move to other places if you closed the door ahead, and If Qais Ra'id is alive when other two are killed, he’ll turn neutral and talk to you. Keep in mind that the entire scene, including the HP of these three adversaries, may reset if you retreat and close the door. Most dialog options end up in killing Qais Ra'id, but if you tell him you’ll come back to keep him company after you explore the temple, he’ll remain neutral and follow the protagonist around (interestingly, or is it a bug?). The library has the following items:
- (x=2500, y=500) Summon Efreeti scroll, random scroll
- (x=2270, y=670) Dusty Book, Dusty Book, Summon Hakeashar scroll
- (x=2200, y=500) Dusty Book, Summon Djinni scroll
- (x=2100, y=500) Dusty Book, Dusty Book
- (x=2000, y=500) Tale of the Prophet Unproved, Dusty Book, Dusty Book
- (x=1850, y=700) Stone to Flesh arcane scroll
Take the Tale of the Prophet Unproved with you. You won't be able to finish this dungeon unless it's in your inventory. Head through the door (x=1800, y=950) to exit the library, walk the path on the empty squares:
		 _____ _____ _____ _____ _____ _____
		|     |     |     |     |     |     |
		|  X  |     |     |     |  X  |     |
		|_____|_____|_____|_____|_____|_____|
		|     |     |     |     |     |     |
    <--- Stairs	|     |     |  X  |     |     |     | Library --->
		|_____|_____|_____|_____|_____|_____|
		|     |     |     |     |     |     |
		|     |     |  X  |     |  X  |  X  |
		|_____|_____|_____|_____|_____|_____|
If any X square is stepped upon, either a hostile Small Spider, Giant Spider, Sword Spider, or Phase Spider will be summoned. The traps will trigger ad infinitum.
In the room beyond is a chevron-shaped trap (x=750, y=1220), behind which lurks a Bloated Spider, plus a chatty, hand-hungry face over at (x=650, y=800). You can only solve this riddle if you brought along the Tale of the Prophet Unproved book from the library in your inventory. Activate the face to initiate dialogue, choose 1>2>1>1>any for the riddle, and the door (x=970, y=970) will open.
Raffiyah, who is borrowing Centeol's creature sprite, situation, and choices of pets and habitat, lies in there. She is quite open to flattery, and you can:
- Kill her and loot the Shroud of the Unproved from the sarcophagi behind (22000 xp for everyone)
- Trick her to fetch the shroud then kill her (22000 xp for everyone)
- Trick her to fetch the shroud then convince her into believing she can make a better one while you “help” relieve the old one (no xp due to bug)
With the Shroud of the Unproved and no hostiles around, Hexxat will prompt you to leave, which you may postpone, as usual. Once back in Graveyard District, either leave her or accompany her over to the Copper Coronet to take the Casque and Shroud to Cabrina. Hexxat is now finally free to act on her own. Her banters will continue, and so will her romance, if your protagonist is female.
Throne of Bhaal[]
There's a possible glitch which causes Destroying the Order of Eight Staves to fail
to trigger after this part of the quest. Do Neera's quest before Hexxat's to avoid the
bug.
With Hexxat in your party, go to The Zephir in Amkethran to meet up with Cabrina. She will inform you they have upgraded Casque of Dragomir with the previous items you acquired to create Casque of Entrapment and send you on a quest to regain a former servant of "L"'s, a Lich named Korkorran. You can tomb walk there right now or speak to Hexxat later to do so.
After a few steps in the tomb you meet Phreya, who will attack you no matter what you say, but disappears as she drops low in health. In the corridor to the left there is a hidden door that leads further into the tomb. Along your way you will encounter a few Greater Mummys until you encounter Phreya for the second time. After a short talk she will fight you and then disappear again when her health is low.
Next you meet a lady named Umolex waiting for some fresh corpses. Annoyed that you are actually alive she will attack. She drops a Robe of the Evil Archmagi. A room later Phreya attacks you for the third time before vanishing again. The next rooms are inhabited by Sand Golems. The area that looks like the undisarmable spike trap from the last tomb doesn't seem to do anything than to look scary. The room behind it contains two Beholders and Phreya with the same procedure as every time. The door to the left leads to a dead end with Culak and his spider pets, giving you a Ring of Free Action and a Girdle of Hill Giant Strength.
A hidden door in the Beholder room gets you to the last quarter of this tomb. To open the locked door close the one you entered the responding room with. Behind it you will find a necrotic barrier that only hexxat may pass, so go ahead and split the party. Again, close the door behind you to open the next ones. The left room is a dead end for the moment as you can't open the next door within it. The right one only lets you proceed south and then west where you meet a Bone Golem named "T'Lassus of the Bones". It guardes a switch that deactivates the necrotic barriers, opens all of the linked doors and links the locked doors of the right and left room to the doors you enter these rooms with. Both lead to Phreya and Korkorran. This time you can kill Phreya as well as the Lich for Ring of Infravision and Boots of Stealth. But something isn't right. If you haven't read the unique books of this tomb yet, you should read them now. Proceed and you will find the real Korkorran. Be nice to him and you get more interesting dialogue about Hexxat. Hexxat can ask Korkorran to make her human again, which he does. After Hexxat becomes human she ages 237 years then dies and cannot be resurrected. Either way, now kill him. Once finished "L" will appear in the form of the resurrected Lich's corpse to address Hexxat. He says he will honour the agreement and that Cabrina will be in touch.
The next time you rest Cabrina will appear with "L" in the form of Korkorran. It is revealed that the deal stuck between Hexxat and "L" (who we learn is Larloch) is for Hexxat to become mortal. If this happens she will die permanently as her mortal years rush to meet her. It may seem there is simply no convincing her not to go through with this deal but if you allow her to have her say, and then agree to kill her if she asks, she will stay a vampire for you and remain in the party. Interestingly there are several options requesting her to make you a vampire, but they all lead to Hexxat stating "I cannot give you what you desire. If I made it seem otherwise - well, I'm good at making it seem otherwise. But I'm done using you". - possibly indicating that allowing the player to become a vampire was in development but scrapped.
Gallery[]
- Portraits from Portraits Portraits Everywhere

